All missions in It Takes Two
-
 Chapter 1 — The Shed
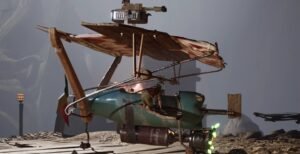
A Dusty Job: How to Defeat the Vacuum Tower
What you’ll do in this section Boss overview: what the Vacuum Tower does The Vacuum Tower relies on a single offensive pattern: it fires incendiary spray cans at the characters. After the attack, a platform on the far side of the arena begins to rise, enabling your counterplay. Key takeaway: This fight is about coordination, […]
-
 Chapter 1 — The Shed
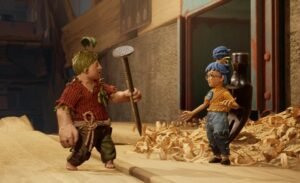
Underpass
What you’ll do in this section New abilities: nails and hammer After the post-boss cutscene, you’ll gain your first “signature” tools for this chapter: Key takeaway: Most puzzles here are a two-step rhythm: May sets the timing/position, then Cody locks it with a nail. The first platform lock puzzle Raise the platform so Cody can […]
-
 Chapter 1 — The Shed
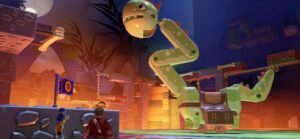
How to Beat the Tool Box
What you’ll do in this section Phase 1: Break the locks with nailed hand-slams Set up the left-hand pin Keep your eyes on the boss’s left hand. You’ll spot two wooden slots—each one can take a nail, and they’re the key to holding the hand still. Cody should be ready to throw nails into those […]
-
 Chapter 1 — The Shed
Under Voltage
What you’ll do in this section Use wires to move through the area Ride the wires whenever the path branches Look for usable wires that link platforms or sections of the room and use them to reposition fast. If you’re unsure where to go next, take the wire that leads forward into a new platform […]
-
 Chapter 1 — The Shed
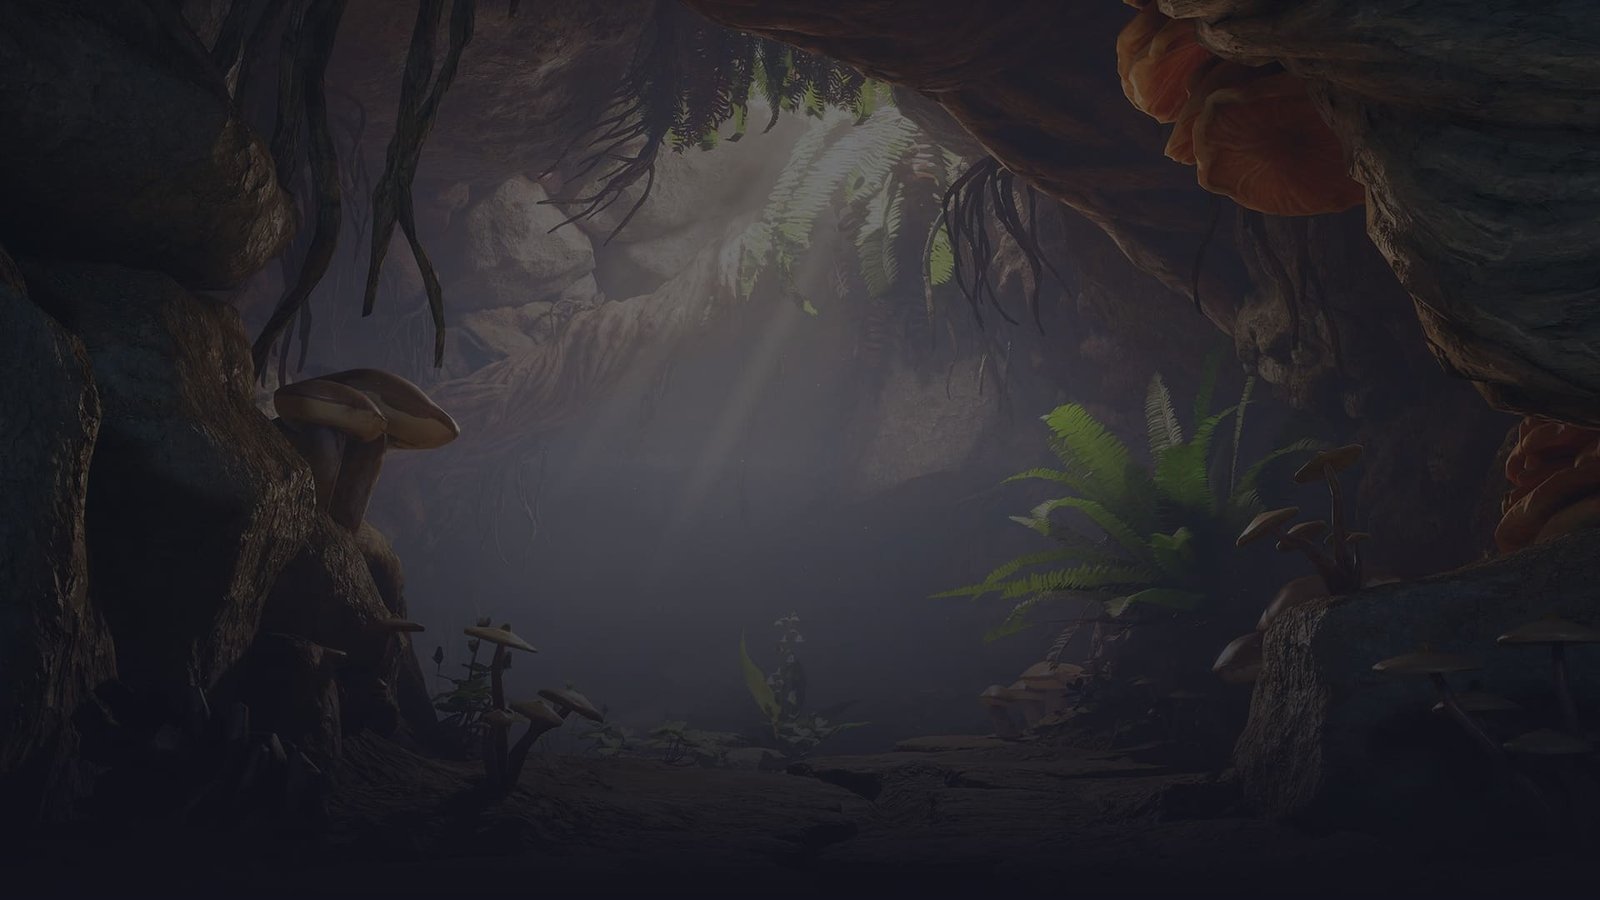
Shed: Introduction
What you’ll do in this section Restore power and reach the first co-op climb Trigger the generator overload and collect the fuses After the opening cutscene, head straight to the generator and interact with the lever. The overload knocks loose three fuses—two land nearby, while a third one moves away along the path ahead. Pick […]
-
 Chapter 2 — The Tree
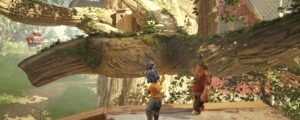
Fresh Air, Captivity, and Rooting
What you’ll do in this section Fresh Air Climb to the squirrels’ base You start on a huge tree trunk with clear grapple hooks above you. Use those hook points to pull yourselves upward, chaining climbs until the route funnels you into a story moment at the squirrels’ base. In Captivity New abilities: sap + […]
-
 Chapter 2 — The Tree
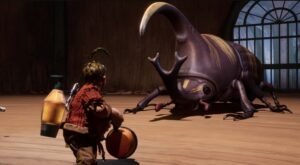
How to Beat the Giant Beetle
What you’ll do in this section Set up the resin trap Find the four holes On the small platform, look for four separate holes in the floor that can be filled with resin. These are the only setup you need before you can start landing hits. Fill all four holes with resin Make sure each […]
-
 Chapter 2 — The Tree
Extermination and How to beat the Wasp Queen
What you’ll do in this section Ride the insect to the arena Take the only path forward Climb onto the insect and follow the one available route. This stretch is essentially a moving gauntlet—keep momentum and react to what spawns ahead. Coordinate your roles on the move Cody stays focused on steering and keeping the […]
-
 Chapter 2 — The Tree
Escape
What you’ll do in this section Fly the improvised plane through hazards Regain control after the cutscene Once the scene ends, the co-op roles are locked in: Cody is responsible for steering the plane, and May is responsible for shooting. Clear the route by burning obstacles May should focus on destroying whatever is blocking the […]
-
 Chapter 3 — Rose’s Room
Pillow Fort
What you’ll do in this section Explore Rose’s room and find the astronaut monkey Check the room for side activities Take a quick lap around the bedroom and interact with anything that looks like a dedicated play area. These mini-games are optional, but they’re easy to miss if you rush straight to the exit. Trigger […]
-
 Chapter 3 — Rose’s Room
First Floor (Purple Portal)
What you’ll do in this section Arrive on the platform and set up the ball push Identify the key objects You’ll land on a wide platform with an unusual ball and a glass cube positioned above where May can reach if she gets enough height. Put May on top of the ball Have May jump […]
-
 Chapter 3 — Rose’s Room
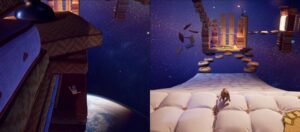
First Floor (Red Portal)
What you’ll do in this section Get to the central planet Cross using rails and floating planets Follow the available rails, then hop across the nearby floating planets to reach the large, improvised planet in the center. If you’re unsure where to go next, look for a rail you can ride or a planet drifting […]
-
 Chapter 3 — Rose’s Room
Green Portal Floor 1
What you’ll do in this section Walkthrough Follow one route, solve it two different ways This trial plays like a 2D platformer with one main direction of travel. You’re moving through the same “lane,” but each character handles obstacles differently. Key takeaway: If you’re stuck, don’t look for a second route—look for the same route […]
-
 Chapter 3 — Rose’s Room
Blue Portal Trial – Second Floor
What you’ll do in this section Get Cody inside the arcade machine Shrink down and enter the cabinet Have Cody reduce in size, then move up to the arcade machine and climb/enter into it when the interact prompt allows. Once Cody is inside, May takes over the outside controls to start the sequence. Launch Cody […]
-
 Chapter 3 — Rose’s Room
Purple Portal Trial: Second Floor
What you’ll do in this section Objective: Power the robot with four lightning statuettes You’re on a large trial platform with the robot at the center. Your goal is simple: locate four lightning-shaped statuettes and bring them back to the central platform. Lightning Statuette #1 (right side — Cody only) Head to the right of […]
-
 Chapter 3 — Rose’s Room
Orange Portal Trial – Second Floor
What you’ll do in this section Walkthrough Reach the central platform Move across the pillows until you land on the large platform in the center of the room. Look for a seesaw set up nearby—it’s the “launcher” for this floor. Throw May upward with the seesaw Have Cody stand on one end of the seesaw […]
-
 Chapter 3 — Rose’s Room
Astronaut Monkey Boss Fight
What you’ll do in this section Phase 1: Turn the laser against the boss The astronaut monkey attacks with a laser, and this phase is all about positioning. 1) Assign roles (distract + trigger) 2) Use the raised platform as cover Once the glowing platform lifts: Breaking the glass platform damages the boss. Reset quickly […]
-
 Chapter 3 — Rose’s Room
Classics
After the cutscene with Rose, you’ll be back in her room. Use the blocks to open paths and keep moving forward. When you reach the area with animal-picture blocks, stop and coordinate. Puzzle 1: Animal Blocks (Player A on blocks, Player B on rails) Correct sequence: Puzzle 2: Swap Roles (Player A on rails, Player […]
-
 Chapter 3 — Rose’s Room
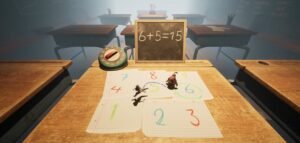
Classroom Trials to Rose’s Kaleidoscope
Classroom Trials (Math, Memory, Dot-to-Dot) You’ll hit three back-to-back “school” challenges. They’re simple once you split jobs and call things out fast. 1) Math Challenge (Number tiles 1–9) 2) Memory Challenge (Find the Pair) 3) Dot-to-Dot Challenge (Shared Pencil Controls) This is the coordination test. Marble Maze Tables (Roll the Ball to the Goal) After […]
-
 Chapter 3 — Rose’s Room
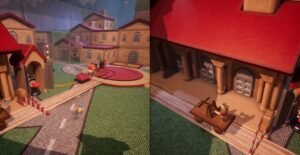
Railway Station — Figurine Locations & Exit
At the railway station, your main objective is to inspect the miniature (toy) town and collect several figurines before moving on. Figurines to find Fast, reliable search route How to proceed to the next level
-
 Chapter 3 — Rose’s Room
Dinozavria — Co-op Platform Puzzle Walkthrough
Split the roles How the puzzle works Clean execution loop (use this every time) The tricky part: the final two platforms These are the ones that usually cause wipes because the big dinosaur can’t grab what it needs—until you coordinate the flip. Common failure points to avoid
-
 Chapter 3 — Rose’s Room
Pirates on Deck
In this chapter you jointly pilot a toy ship. The key twist is that steering is shared: each player controls one blade, so the ship only turns when both players input the same direction. If one turns right while the other turns left, those inputs cancel and the ship won’t rotate. What to do Move […]
-
 Chapter 3 — Rose’s Room
How to Defeat the Giant Octopus
The Giant Octopus is one of the easiest bosses because it’s very slow. Your job is to keep steady damage on the boss and only interrupt to punish its one real threat: the tentacle strike. Core plan Step-by-step Common mistakes to avoid
-
 Chapter 3 — Rose’s Room
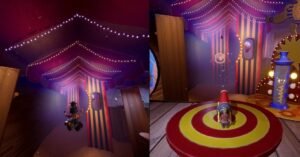
The Main Performance
What you’re trying to do Lower the bridge leading to the Elephant’s Castle by transporting an iron ball through a sequence of clown toys, then using a cannon and a slingshot to release the bridge mechanism. 1) Move the iron ball across the clown toys 2) Use the cannon to knock balls off the targets […]
-
 Chapter 3 — Rose’s Room
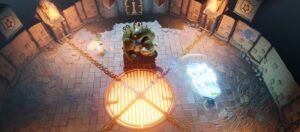
Dungeon Dwellers
After the cutscene, the game shifts into an isometric, action-RPG style segment. Your job is simple: keep moving forward and clear every enemy that blocks the route. Cody’s kit (ice) May’s kit (fire) Fast, reliable clears Final room: the giant doll When you enter the last room, a huge doll attacks.
-
 Chapter 3 — Rose’s Room
How to Beat the Toy Bull
This fight is an arena puzzle, not a straight damage race. Your progress comes from removing the four chains that hold the grate in the middle of the arena. Once all chains are gone, you switch to attacking the boss’s hands. What to look for The winning loop (repeat 4 times) After you’ve removed all […]
-
 Chapter 3 — Rose’s Room
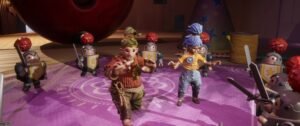
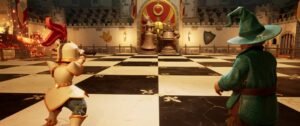
How to Beat the King and Queen
You’re fighting two chess-piece bosses on a board while other pieces jump in to attack. Focus your damage on the King and Queen—the extra pieces are there to force movement and punish greed. What you can do in this section The core plan What to dodge (the fight killers) Handling the “extra” chess pieces The […]
-
 Chapter 3 — Rose’s Room
The Queen — Catching the Elephant in the Claw Machine
You must retrieve the elephant queen (Cutie) after she hides inside a toy claw/vending machine. What to do (the reliable way) If you keep missing, it’s usually one of these
-
 Chapter 4 — Cuckoo Clock
Gates of Time
When your current plan fails, the Book sends you to the Gates of Time for “family therapy” and upgrades both characters with new powers: 1) Learn the rewind: statue, then the blocked passage Start by practicing Cody’s power on obvious “broken” targets: 2) Beat the timed door with May’s clone You’ll reach a locked door […]
-
 Chapter 4 — Cuckoo Clock
Clockwork Mechanisms (Dome Break)
You’re flying over the clockwork canyon on your bird mounts. The main clock tower is blocked by a protective dome. To drop it, you must clear both side towers and destroy the two shield devices they power. First Tower: Symbol Wheel + Clock Order Second Tower: Three-Color Clock Platforms Finish: Open the Central Tower Once […]
-
 Chapter 4 — Cuckoo Clock
Echoes of the Past
1) Survive the moving wall 2) Reach the next puzzle from the statue hall 3) Get the first key from the falling cage 4) Get the second key 5) Unlock the boss encounter
-
 Chapter 4 — Cuckoo Clock
How to Beat the Clockwork Bull
What you need The win condition Make the bull charge into the statue’s pedestal so the bust/figure drops onto the bull. You must land three successful hits. Exact boss loop (repeat until it’s down) After the bull: push forward + clear the time loop Keep moving forward, opening paths with Cody’s time and May’s clone. […]
-
 Chapter 5 — Snow Globe
The Ice Starts to Break
This chapter introduces magnet powers. The rule is always the same: opposites attract, same colors repel. May holds the blue half. Cody holds the red half. Magnet powers (remember it this way) When you’re stuck, stop and check the color on the object (disc, handle, bridge segment, mechanism). Then pick the player who can pull […]
-
 Chapter 5 — Snow Globe
Winter Village
You arrive in the main frozen settlement with three marked bell towers (left, center, right). Ring all three bells to thaw the village and unlock the central dome/elevator that takes you to the next section. Left Tower (Rotating Wall) Goal: Get Cody up the tower using a rotating wall segment. Fast tip: Cody should stay […]
-
 Chapter 5 — Snow Globe
Beneath the Ice
You’ll reach a central platform with three color-coded pipe routes branching out. Your goal is to restore production by completing all three routes: Red, Blue-ish/White (often called “blue” because it looks light-blue), and Green. Quick co-op setup (saves time) Blue-ish/White Pipe (underwater wrench + fish) This route drops you to the bottom area where you’ll […]
-
 Chapter 5 — Snow Globe
Slippery Slopes
This segment is a co-op coordination check: one player anchors to magnetic targets while the other stays connected so the wind can’t separate you. Know your magnet roles (quick rule) 1) Start the section and reach the ice crack 2) Unlock the “pull-to-partner” move After the cutscene with the book, you gain a stronger ability: […]
-
 Chapter 6 — Garden
Green Fingers
What’s new in this chapter Cody May Walkthrough: Green Fingers, step by step 1) First infected plant + first soil pot (dandelion) 2) Next soil pot (cactus to clear the blockage) 3) Leaf-platform section (get May over the gap) You’ll reach a stretch where May can’t cross alone. 4) Blue pitcher plant (open the way […]
-
 Chapter 6 — Garden
Weed Whacking in The Garden
This section shifts fast from platforming into steady combat and co-op timing. May’s toolkit is a water hose plus a sickle, while Cody fights and solves pathing with a vine sprout and plant transformations like a cactus turret. First arena with the shielded tree enemy Early on, you’ll meet a bulky tree creature that blocks […]
-
 Chapter 6 — Garden
On Foreign Territory stealth cave guide
You start this segment in a wet cave where noise is the main threat. Your job is to cross quietly until the moles wake up, then survive the chase to the exit. Read the noise meter A noise bar appears on screen once you’re close enough to the sleeping moles. Treat it like a limit […]
-
 Chapter 6 — Garden
Frog Pond
After the cutscene, you’ll ride two frogs and keep control of them for most of this section. Your next goal is a large pool with floating tiles that only appear when a player stands in the right spot. Crossing the tile pool You can’t brute-force this. You must spawn tiles in order. Call the move […]
-
 Chapter 6 — Garden
Down With Infection
This stretch of It Takes Two happens in the Garden chapter as you move from Frog Pond into the greenhouse. There’s an optional Snail Race minigame nearby, then a short co-op timing puzzle, followed by greenhouse combat and the Joy boss fight. Snail Race detour After you dismount the frogs and move forward on foot, […]
-
 Chapter 7 — The Attic
Setting the stage
This section is built around two new mechanics: Cody’s cymbal and May’s voice. You’ll move through a recording-studio themed space, enter a jukebox, clear a circuit board, steer a platform through lasers, and deal with microphone snakes. New powers for this section If something needs gentle control, use singing. If it needs a shove or […]
-
 Chapter 7 — The Attic
Rehearsal overview
This Rehearsal section is a teamwork check built around two ideas: activating musical controls fast, then moving safely through a dark room where light is life. You will clear a keyboard gate, survive a spotlight platforming run, and finish by reaching a switch that triggers the ending cutscene. Open the first gate At the start […]
-
 Chapter 7 — The Attic
The Symphony
Quick goals Before you enter the section If you care about completion, look for the Chess minigame near the entrance leading into Symphony in the attic hub area. It becomes available after you return to the hub from the earlier sequence, and it sits on the ground floor by that entrance. If you only want […]
-
 Chapter 7 — The Attic
Cloud Room and Demon Room
These two puzzles are built around the same chapter tools: Cody’s cymbal and May’s voice. You’ll progress fastest by splitting roles and calling out targets clearly. Cloud Room Walkthrough The room has floating clouds, a locked cage, and thick fog hanging low. Use a simple loop: Demon Room Walkthrough Your only job here is to […]
-
 Chapter 7 — The Attic
All to the Dance Floor
This finale section of It Takes Two is built to be a clean sprint to the finish: keep moving, avoid hazards, then run a short DJ sequence to hype the crowd and close out the level. In some guides this part is labeled Turn Up, and in others it appears as All to the Dance […]